Thursday, 21 May 2015
final work
Im Happy with the final outcome of my image i think if i was to do this again i would put more thought in to the overall structure. i feel i should of looked more carefully at pictures of Tjentiste Monument. I could do other ways of texturing which i lent as i went along and knowing what works with having layer modes to overlay and playing with the opacity.
final work and uv unwrapping
here is half of my final image based on part of a Buddha head and yugoslav war memorials i wanted to create something different and i loved the shape of the bruital architecture. i thought this would be easy to sculpt as it had no rules of how to create a simpler shape which i found quite fun. but when it came to unwrapping the textures it all looked very confusing with working out which bits which,
Lighting
There are many different lights in Maya i found i spent quite a lot of time playing around with the lights to get the best effect for my model. when it came to my final model i used an ambient light and a spot light changing the angel of the light. i then added a blue tint to give it a moon light feel.
Photoshop, Crazybump
I made this texture in Photoshop. I then imported it in crazy bump to make a bump map to add to my grass floor in my final image. The black makes it sink into the plain when the white makes it extrude out of the plain.
Diffuse, Bump map, Specular and AO
i wanted to try and understand more about types of maps in maya i found it quite confusing understanding what each one does.
the diffuse map or colour map in the bottom rite hand corner is my basic texture which i copied different images from the internet and also hand painted them on Photoshop to get the effect i wanted.
bump maps is the purple looking one this adds great surface detail to a model without affecting the topology of the mesh. The map is generated from a 2d bump map.
specuclar map is used to define both the colour and strength of the specular reflection highlights.
AO maps give shadow to my model focusing on different surfaces to generate a shadow.
Ideas for final
I wanted to try put both of these studies together for my final peace. i really like how the shape works of the brutal architecture and i thought i could try and recreate this in my own way with out it being exact. with adding half of the buddha face in the middle just by creating one side of the piece i can always duplicate special to create the other half.

Tuesday, 19 May 2015
Textures Colour Map
My Four Studies
my first textured model. I found part of the texture was stretched in one place where i had not made sure the uv checker was even. Next time i will make sure to take more care with the uv checker.
Ponte Tower.
I love this tower and the feel and effect it has i wanted to try and model it and try and capture the depth. i started modeling it from one window then duplicating and merging it together to make one ring. then duplicating it upwards. I would like to come back to finishing this model adding different windows in the texture.
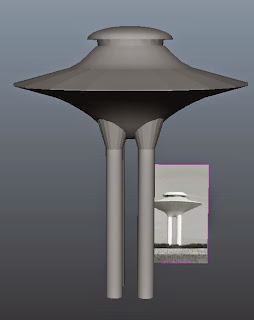
Water Tower i wanted to try do different parts of architecture to what people did in my year. I liked how the water tower looked like a ufo and thought this would be fun to model.
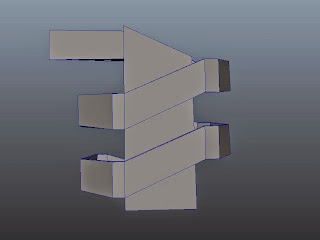
I also did some steps from the uea. i found a good way of copying the last move i did and being able to copy and repeat to make a spiral.
Brutal Architecture
I then started to relate to my project which i had to have four model studies. on architecture or various objects i found interesting and could challenge me. I started looking at pictures on brutal Architecture as i found this interesting and i thought the shapes would be easy to model and texture.
here are some of the pictures i found most intersting.
here are some of the pictures i found most intersting.
Buddha head
I then found an interest in a Buddha head that i sore in a shop. i took some pictures and then by adding them in as a picture plain i then started to model directly from the picture. extruding from edges and pulling vertex. After a while of playing around i found this might be in a bit of the deep end for me. but i was quite happy with what i created i really like how you can make one side of the face and duplicate it to the other side to make the full face.
Introduction
 First time using maya I found it difficult to get use to the layout of using the different tools. I found going at my own pace from following youtube videos on how to create a sword for Dota2 very helpful as I could stop and rewind getting use to the different tools. this is a picture of the sword i tried to create.
here is the high polly version i was happy with the outcome of this model even tho i found it hard at the start.
low polly model ready to strart uv. instead of carrying on with the sword to the next level i wanted to carry on practicing modeling.
I would now feel comfortable to carry out to the next stage from what i have done in class on uv unwrapping.
Subscribe to:
Comments (Atom)


